Showing posts with label banner. Show all posts

Saturday, June 1, 2013

Ysabella's 8th Birthday Party Preparations

     Okay...so here are the photos I promised to share. These are the stuff I made as part of Ysabella's 8th Birthday Celebration which was movie-inspired. Please see related post below for a peek at the party.

     Let's start off with the save the date cards, invites, and TY tags. Note that the invites were not matted yet when photos were taken. I matted them on black cardstock eventually. I created them digitally...and had so much fun!


TY tags


Save The Date cards

Invites (I haven't matted them here yet)


Quick and simple...and super inexpensive, too!


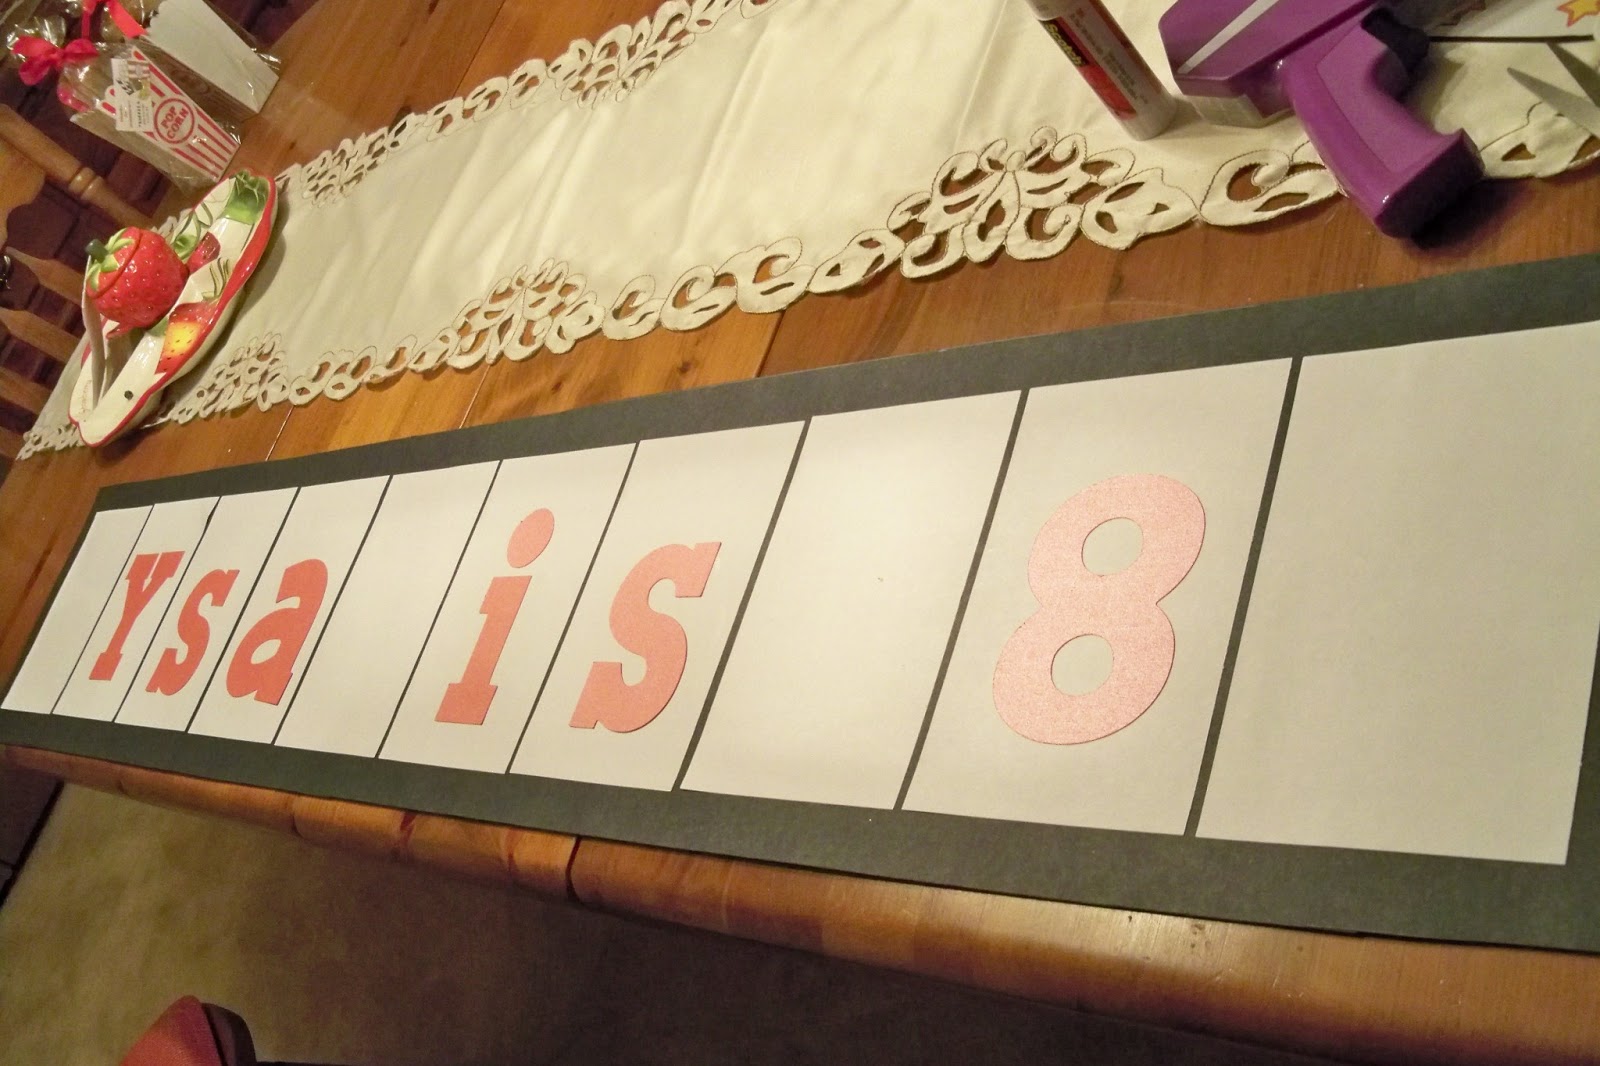
     Now on to the party banner. I tried not to go crazy because as I mentioned in my last post, the party room was small so there wasn't much to decorate. However, I still wanted the banner to emphasize the party theme so I made one that had the look of a filmstrip! See photos below...


Black poster board, white copy papers


I cut the letters out of my Cricut

Forget the traditional "Happy Birthday"...
I wanted it to be a little different : )

Laying the characters down

Embellished with movie-inspired party decors
from Party City


Another party decor I used to
emphasize the theme


Tadaaa!!!


      For the favors or goody boxes... since the party was movie-themed, it was only fitting that I used popcorn boxes! : ) I purchased them from a dollar store for 2 boxes/dollar. I originally thought of making them out of my Cricut but since it would be paper-based, then it won't last so long. The popcorn containers can be re-used over and over so I thought it was more appropriate, especially if the kiddos were to watch home movies.


     I hope you liked my party decor ideas! If you have any questions, just leave a comment.
     Like the tag said...thanks for popping by! : )


xoxo,
HANNAH


Wednesday, June 6, 2012

Father's Day Cards Mania

     It's Cards Mania once again! I had to take a break from the summer or luau themes to make way for another important occasion in our lives...Father's Day! 
     I made 5 cards. I challenged myself to use different color combinations to see how they'd come out. So far so good : )

An overview of my latest projects

     The next photo shows one of the cards in which I used a left-over banner piece from Ysabella's birthday last April. I was actually looking through my paper stash when I saw this and I figured, I can dress it up and convert it to a card! I scored the top layer about 1.5in. from the top before glueing that part to the top of the banner base (kraft). I was able to create the "card fold" in that manner. The message or greeting can then be written on the banner base (see next photo). I wanted to put a flower to make the piece prettier but I didn't want it to look so girly so I chose vanilla and blue colors to do that. The "#1 Dad" comes from "Celebrate with Flourish" Cricut cartridge.

A banner card
      
     Here's how the banner card opens up. I hung it on a little door knob to show you another way to present it. This way the recipient can take it to work and proudly hang it somewhere in his office!

The message can be written on the banner base.
It can also be hung anywhere in the house to surprise Dad!

      
     Here's the rest of the cards...

Love, love, love the Cameos!

    
      I'll show individual photos of the cards on my next post. So hang in there!


Thanks for coming,
HANNAH

Monday, May 28, 2012

Dessert Bar Banner

     Took a while but I finally found it...a photo of the dessert bar banner I had made for Ysabella's birthday party last April 8th. I was actually looking for a different photo when I happened to see this. I didn't know our volunteer photographer (thanks, Aivs!) was able to capture the banner in full view.

"Ysabella's Sweet Shop" Banner


     I made the banner using the following Cricut cartridges: Birthday Bash (banner), Ribbons & Rosettes (rosettes) and Alphalicious (letters). Colors I used: Kraft (banner base), Cream (banner), Pink (letters), and Pink/Green patterned papers (rosettes). I strung the pieces together with a ribbon. Super-easy to make. This can also be created without a Cricut. Simple cutting with scissors will do for the banner shape, and then the letters can just be enlarged and printed out from a word-processing software. There's a million fonts available on the web nowadays so the letters should not be a problem at all.

     This was another banner I made for that day. It says "Happy Birthday Ysabella". I altered the colors on this one a little bit, and I used Mother's Day Bouquet Cricut cartridge for the flowers. 

"Happy Birthday Ysabella" Banner

     I hope this helps anyone who's planning to make a diy banner. I just find them really pretty and they add some character to any kind of party or celebration.
     

Happy Crafting,
HANNAH